How to Activate Repair/Maintenance Mode
Handing your phone over for repair can feel like letting someone borrow your entire digital life. From texts and photos…
Learn MoreCanadian owned and operated—shop local, support Canadian. ![]()
Whether you’re planning to trade in your phone, send it for repair, or just switch to a new model, backing up your data is the one step you absolutely shouldn’t skip. It’s the key to keeping your messages, photos, and settings exactly how you like them—even after your device is wiped, replaced, or temporarily out of commission.
Unfortunately, it’s also one of the steps people are most likely to overlook.
Let’s walk through how to back up phone data safely, whether you’re using an iPhone or Android—and what to do if you run into issues along the way.
Your phone is more than just a device —it contains personal memories and important information you wouldn’t want to lose.
Backing up your phone keeps every thing safe and easy to restore. Without doing this, starting fresh can mean losing data permanently— or spending hours tr ying to recover what’s gone.
Even if you’re not planning to switch phones any time soon, regular backups can give you peace of mind, just in case something unexpected happens.
iPhone users have t wo main backup methods: iCloud (cloud-based) and computer backups (local). Y ou can also use third-party services for extra layers of backup.
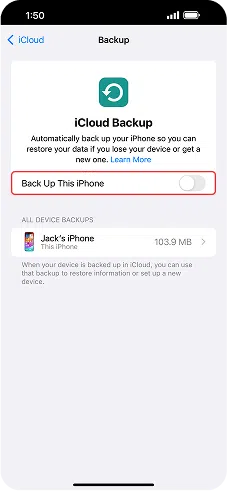
iCloud backup is the easiest and most seamless way to protect your data. It backs up automatically when your phone is:
Estimated Time: 5-10 minutes for most backups. Larger photo or video libraries may take longer, especially on slower Wi-Fi.
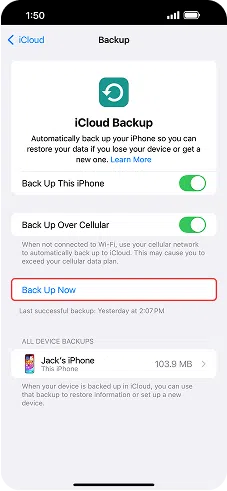
To set it up:
You’ll see the time of your last backup underneath the toggle, so you can confirm it worked. iCloud backs up app data, device settings, messages, photos, videos, and more.
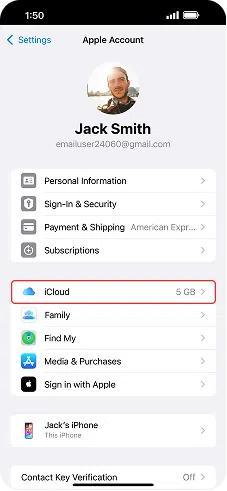
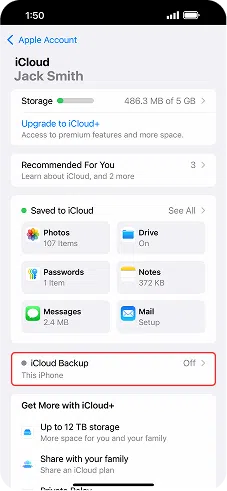
Note: Apple offers 5GB of free iCloud Storage, which fills up fast. If you see messages like “Backup failed due to lack of space,” you may need to:
A backup will not include data already stored in iCloud (like synced photos or contacts)—it only stores local content.
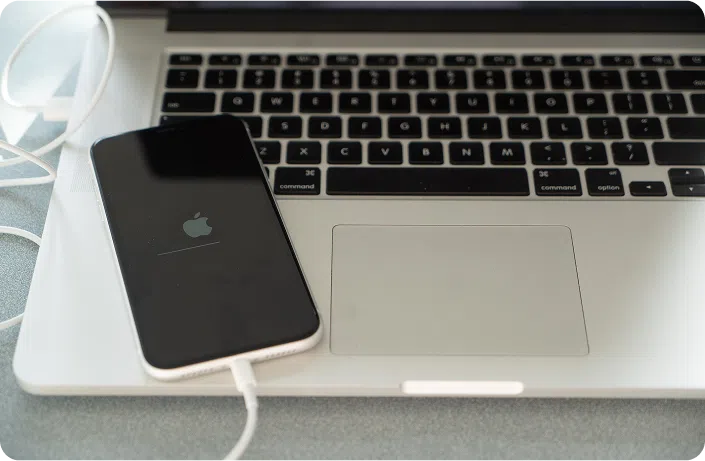
If you prefer a local backup, or don’t have enough iCloud storage, this is a great alternative.
⏱️Estimated Time: 10–20 minutes depending on data size and whether encryption is enabled.
Encrypted backups protect health data, Wi-Fi passwords, Safari history, and more. You’ll need to set a password—and remember it—to restore this kind of backup.
To restore a backup, simply reconnect your device and select Restore Backup.
Want another backup layer? Apps like Google Drive, Dropbox, and OneDrive can be used to store your photos, videos, notes, documents, audio recordings, and PDFs.
⏱️ Estimated Time: 5–15 minutes for initial uploads, depending on file size and internet speed. Ongoing sync happens in the background.
You can upload these manually or enable auto-sync (especially helpful for content that doesn’t always get captured in an iCloud backup).
Note: Third-party services won’t include app layouts, SMS messages, or device settings. They’re more like a content archive than a full restore option.
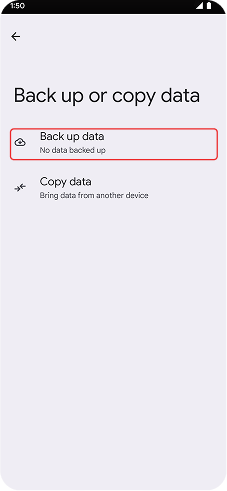
Android gives you lots of flexibility. You can back up using Google One, transfer files to a computer, or use cloud services like Dropbox or OneDrive. Some brands also offer their own software tools.
Here’s how to set it up:
⏱️ Estimated Time: 5–10 minutes for most users. First-time backups with lots of media may take longer.
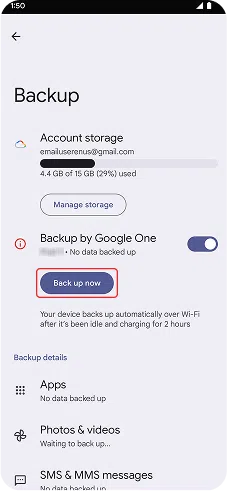
Google’s backup includes:
To check when your last backup was:
Once enabled, Google backs up regularly when your phone is charging and connected to Wi-Fi.
Restoring is easy: during setup on a new phone, just log into your Google account and follow the prompts.

Manual backups can offer more control. To copy your data to a PC or Mac:
⏱️ Estimated Time: 10–30 minutes depending on how much data you’re transferring.
You can also use manufacturer-specific software:
These tools often back up messages, call logs, apps, settings, and even alarms.
For extra peace of mind, use services like:
⏱️Estimated Time: 5–20 minutes for initial setup and uploads. Larger media libraries will take longer, but future syncs are automatic.
Set them to automatically upload your media, or use them for manual file uploads. Just like on an iPhone, these services focus on content—not full device state.
Think of backups like brushing your teeth: it’s easier when you build it into your daily habits.
🔐 Curious how Mobile Klinik protects your privacy? Check out our Privacy Commitment.
Even if everything’s set up correctly, backups can hit snags. Here’s how to handle the most common issues:
Get a free phone diagnosis in 5 minutes when you visit us in-store.
Learn more
Backing up is just one part of getting your phone ready for its next chapter. Whether you’re preparing it for a repair, resale, or handoff to someone else, you’ll want to take a few more key steps.
Check out the other guides in this series:
Handing your phone over for repair can feel like letting someone borrow your entire digital life. From texts and photos…
Learn More
Planning to trade in, sell, or repair your phone? Here’s one thing you should consider doing before handing it over—wipe…
Learn More
Whether you’re upgrading to a new device, switching carriers, or preparing your phone for a trade-in, moving your SIM card…
Learn MoreOur certifications show more than compliance—they reflect a commitment to providing high-quality, safe, and sustainable device solutions Canadians can count on.


